ODIExperts.com

The blog for Oracle Data Integrator ( ODI )

November 26, 2009
by kdevendr
1 Comment

Categories: Administration , Architecture , How to , Logic , ODI , Tips and Tricks

Single Post View


Export – Import DWR to EWR having same Master Rep

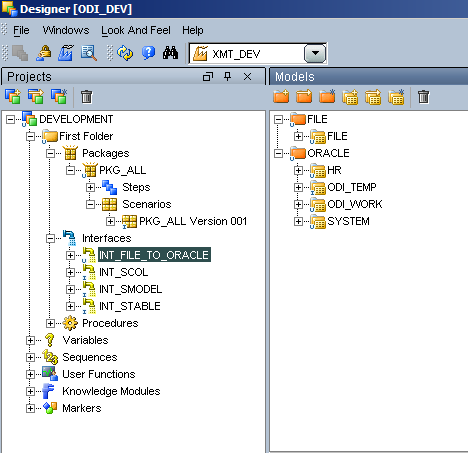
For this particular Example I am exporting Project, Models and all the other objects under it from ODI_DEV [ DWR ] environment to ODI_WORK_EWR [ EWR ]

DWR – Development Work Repository

EWR – Execution Work Repository


Step 1 – Export the scenarios

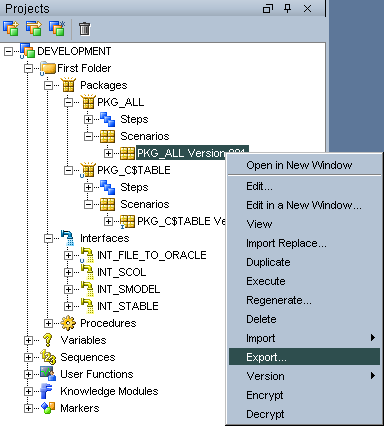
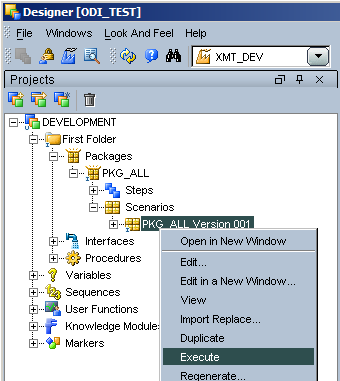
Right click and export the scenario to the required folder


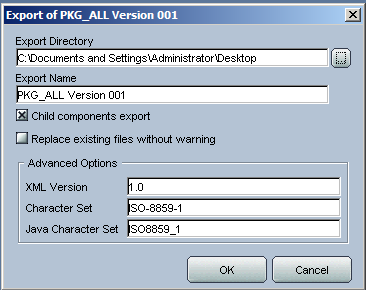
Step 2 – Select the Folder to export the scenarios


Step 3 – Repeat the above steps for all the scenarios to be exported.

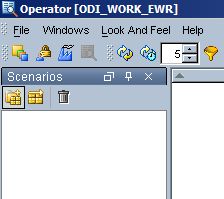
Login into other EWR environment and go the Operator – scenarios tab ,as the EWR don’t have designer enabled.

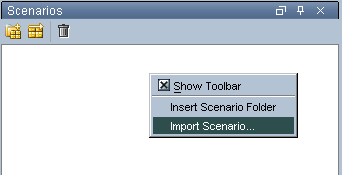
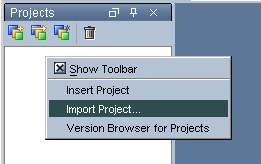
Step 1 – Right click on the Scenario and select ‘ Import Scenario .. ‘


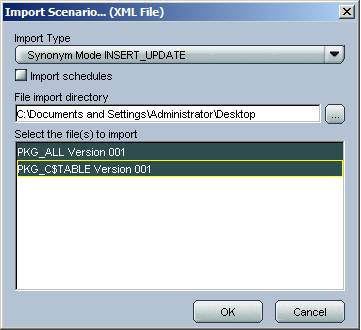
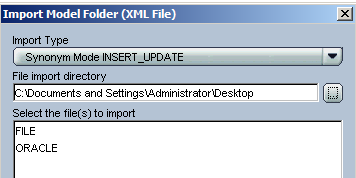
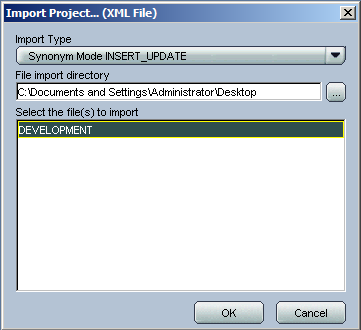
Step 2 – Select the right Import Type ” INSERT_UPDATE ” and the directory to be imported and you would find the list of scenarios to be imported.


The best practice is to use import type ” INSERT_UPDATE ” for the reason being that if the scenarios are already present they would be updated else inserted.

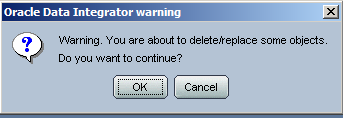
Click ok to the warning


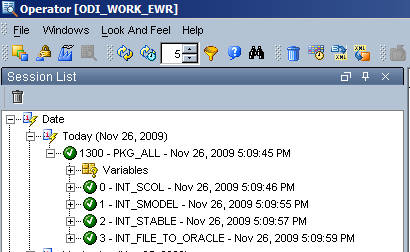
And all the scenarios imported will be visible.


Run the test for one or two for successful scenario import and it works.


November 26, 2009
by kdevendr
0 comments

Categories: How to , ODI , Tips and Tricks

Single Post View


Smart Search

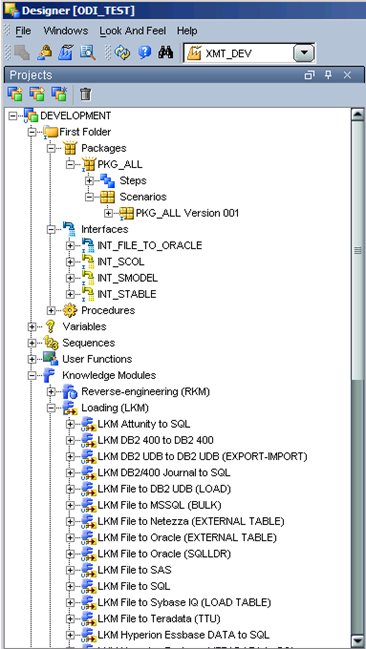
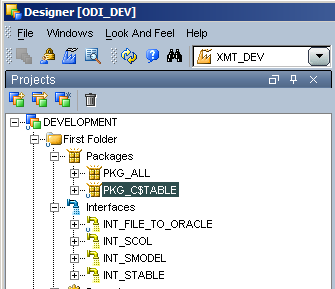
When you have multiple Interface under a folder and you would like to go for a quick search , just expand the folder and start typing your search and  the match would be highlighted.

Please find a screenshot of the example ,as you can see i was searching for INT_SMODEL and the particular item is highlighted.

image

Here i was looking for  DB2/400 LKM and the particular KM is highlighted.

image

November 23, 2009
by kdevendr
2 Comments

Categories: Administration , Architecture , Logic , ODI , Technology , Tips and Tricks

Tags: , , , ,

Single Post View


Export – Import DWR to DWR having same Master Repository

For this particular Example I am exporting Project, Models and all the other objects under it from ODI_DEV [ DWR ] environment to ODI_TEST [ DWR ] where DWR is Development Work Repository

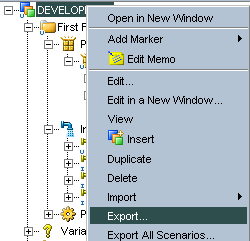
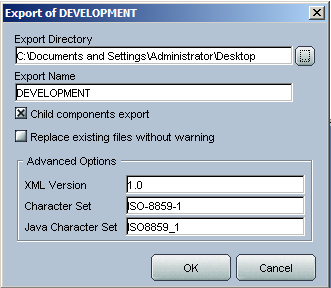
Step 1 – Export the Project

Specify the directory to be exported

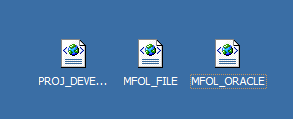
Step 2 – Export the models as shown above and you will find all the exported objects are created as XML Files as shown below.

Lets now move the objects to the other ODI_TEST [ DWR ] environment.

Step 1 – Export the Models

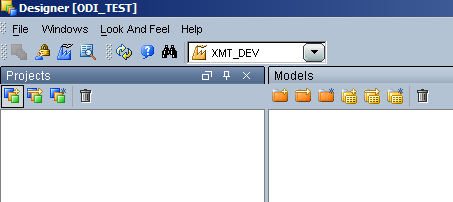
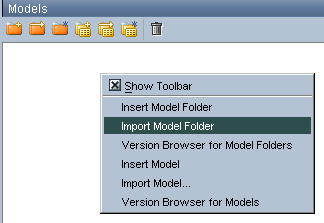
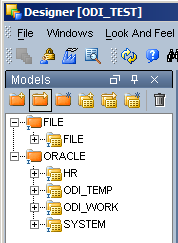
Login into ODI_TEST [DWR] , Right click on the Import Model folder option under the Model Tab.

Go the Folder where the objects are created.

Use only ‘ INSERT_UPDATE’ option as this way it would maintain the internal ID of the objects.

Don’t worry about this warning and click ok.

The models are imported . The next step is to import the project

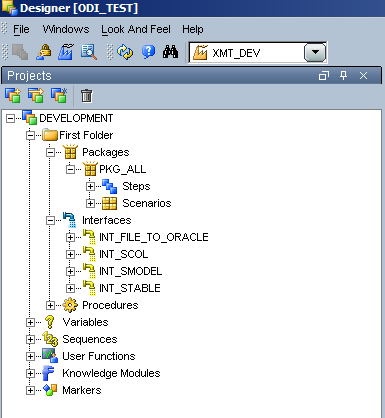
Repeat the above step to import using the INSERT_UPDATE mode and select the project to be import and as you can see all the packages, interface , KM are also imported .

Now lets test the interface for its validity.

Voila it works

  1.  
  2. For this example I have not used any variable in that case I would suggest this order for Import.

  3. Import Models
  4. Import Global Variables , Sequences , Functions
  5. Import Project
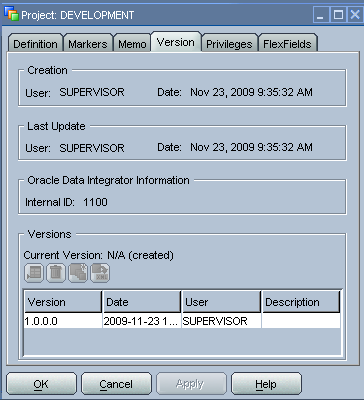
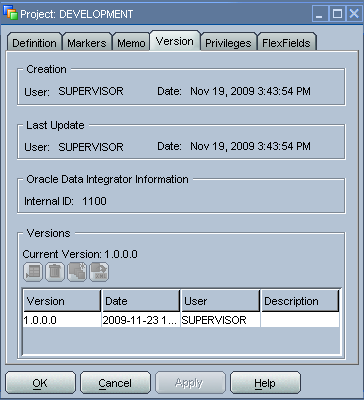
  6. Lets look at the Internal Id of both the environment, they are same , you can compare other objects too and you will find that their internal ID are the same.

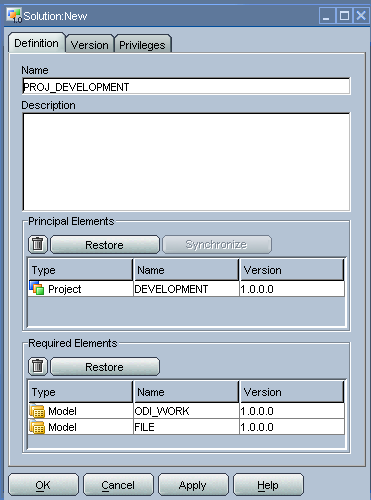
Using ODI Solution

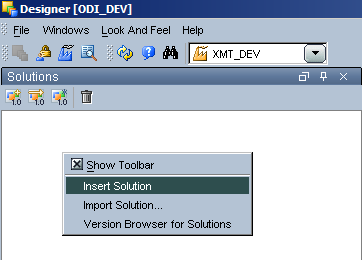
Right click on the Solution and click ‘ Insert Solution ‘

As You can see that , the Project and the Model are created with the required versions.

Now Log into the other DWR environment and since the solution is stored in the Master Repository and we have the same Master Repository . The solution will be visible in the other DWR.

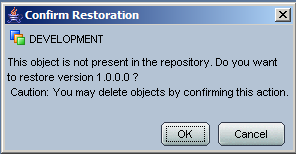
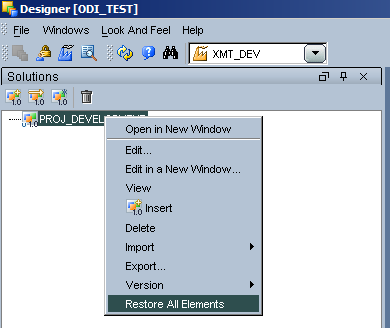
Right click on ” Restore All Elements ” to restore all the objects of the solution.

Click ok on all the warnings

Do so for all the other objects and finally all the objects will be restored to the required version.

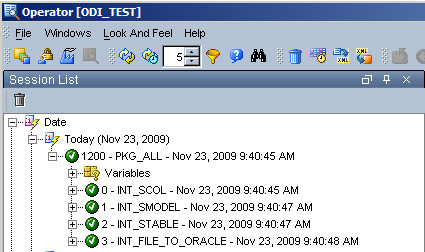
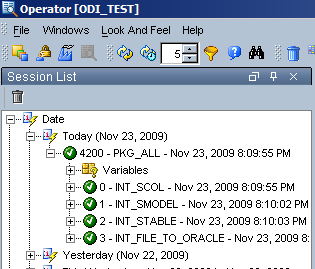
I ran the package again and it worked.


Please find my future post on more best practices and method of Export and Import of ODI Objects.

November 20, 2009
by Cezar Santos
27 Comments

Categories: Architecture , How to , Logic , ODI , Tips and Tricks

Tags: , , , , , , , , , , , , , , , , , , , , , ,

Single Post View


Procedures (or KM) Steps – Source and Target tab’s

Hi All,

There is some time that I don’t write a post, it’s because of the amount of work… too much clients, too much process… but all is perfect! I mean, work needs to exists because then it’s necessary people to do it! 😉

OK, today we are going to talk about those two tab’s at procedure step:

  • Source Tab
  • Target Tab

Obs.: When I say “Procedure Step” I mean “Procedure or KM Step” once this objects are almost the same but this is subject for another post.

Because of the interfaces, that has source and target tables, a obvious association is done and that is right. The difference is:

  • Interface:
    • Has Source and Target Table in generic way, KM’s are necessary to define how to push data from source to target normally in several steps
  • Source and Target Tab’s at Procedure Step:
    • It’s a single action (commands) between a defined source technology and a defined target technology

Before go to examples, a last information:

The most interesting and powerful characteristic of these tab’s is the ability of:

  • When a SQL query (select..) is executed in Source tab, the code wrote at Target tab will be executed once to each returned record from the SQL query


After theory and definitions, examples!

  • LKM SQL to SQL
    • This is the most classical example of functionality and interaction between the tab’s once, after create the C$, it transfers every single record from the query in the source to a “insert” command into target tab (Step 31 – Load Data) 
Code at sorce tab - LKM SQL to SQL

Code at sorce tab - LKM SQL to SQL

 Every single record returned from this query into Source Tab (as it is a LKM, the metadata commands will create the right command)
 
Will be inserted in C$ table by the following command into Target Tab: 
Insert command at Target Tab - LKM SQL to SQL

Insert command at Target Tab - LKM SQL to SQL

 
But this a example from a KM, could we try something in a Procedure?
 
Situation:
  • Send records fom a Postgre SQL table to an Oracle procedure
  • Source Query:
    • Select Name, Age from Client
  • Target Oracle Procedure:
    • pClient(Name as varchar, Age as date)

Before tell you how to implement, let me discuss about a very important issue: How are the returned values “delivered” to Target Tab???

Let’s remember few points:

  • ODI is a code generator
  • The generated code can be at any programming language or RDBMS command
  • ODI variables exists only in ODI, they aren’t able to exist inside, for instance, of a PL/SQL code in execution at Oracle database.

A new point that, maybe, you aren’t aware about is:

  • The responsible to execute the interaction between the Source and Table tab is the Agent

Note that we will send a query from Postrgre SQL to Oracle it means, two distinct RDBMS.

Agent is able to transform the data format

Agent is able to transform the data format

For Oracle people, this explain how ODI can integrate several Oracle databases with no DBLink.

As I mentioned above, ODI will generate the code and send it to the Oracle database, but how to indicate, in the generated code, where use a column from source?

It’s easy. The query I proposed is:

Select Name, Age from Client

The code for target tab will be:

Begin
   pClient(:Name, :Age);
End;

By using the column name prefixed with “:”, ODI understand that is to generate the Oracle code with the equivalent column from Postre query.

If a function was used in the souce like:

select EXTRACT(DAY FROM TIMESTAMP age) from Client

Just add an Alias and use it at target tab:

select EXTRACT(DAY FROM TIMESTAMP age) as Birthday from Client


Well, that is all friends!

The code at Target tab will be executed some many times as the amount of records returned from the Postgre query.

Just remember to setup the respective technology and Logical schema at each tab.

 Best Regards,


Cezar Santos
 

October 30, 2009
by Cezar Santos
7 Comments

Categories: Architecture , Common Errors , Logic , ODI , Tips and Tricks

Tags: , , , , , , , , , , , , , , ,

Single Post View


Subscribers – An example of how to use

Hi friends,

I was helping in a thread at ODI Forum, from Oracle page (http://forums.oracle.com/forums/forum.jspa?forumID=374) and I decided to describe the situation here once several people ask me similar questions

What is a Subscriber and how to use it?

  • A subscriber is a way to get the same data, from the same source, to more than one target (or process) when in CDC (Change Data Capture) mode.

I will try to demonstrate it by an example:

Situation:

  •  In a generic system, when a new client is created it is necessary to upload into a DW and send a welcome email to him.
  •  The email should be send, at top, one hour after the insert
  •  The DW load happens once a day, by midnight.

As you see, these are very distinct process. To solve it using subscribers we could do:

  1. Add the Client table to the CDC (I’m using the Simple mode here)
  2. Add 2 subscribers in the table, I named them sb_EMAIL and sb_DW
  3. Start the Journal process

Ok, now we have the environment ready to both process, load to DW and send the email

If you take a look into the journal table (J$_) after insert a new record at Client, you will see 2 records at the view, one to each subscriber and that allows you to execute distinct process to the same source DML.

In this example, to send the email an interface is used to put the new client in a table (another system is responsible to send it) then all that is necessary to be done is:

  • In the interface, check the “Journalized Data Only” and edit the filter to the subscriber “sb_EMAIL”
  • create the scenario for the interface
  • schedule it to execute once by hour at the minute 59 (like: 10:59 am, 11:59 am,  etc)

And,   to the DW load process:

  • In the interface, check the “Journalized Data Only” and edit the filter to the subscriber “sb_DW”
  • create the scenario for the interface
  • schedule it to execute once by day (midnight)


That is all! If you query the J$_ table near to 11:00 pm you will see all clients that were inserted  during the day with the subscriber “sb_DW” and only the clients inserted after 10:59 pm.

One last point:

if the situation doesn’t need to send the same data to more than one target, just one subscriber can be used to infinite tables.


Well guys, I hope to have reached the objective the explain how a subscriber can be used!!


Cezar Santos
October 24, 2009
by kdevendr
12 Comments

Categories: Administration , Architecture , How to , ODI , Tips and Tricks

Single Post View


Why Creating a separate schema in ODI?

Before jumping into this detail of the topic I would like to make the definition of schema and Work schema with respect to ODI Topology clear and i.e

SCHEMA – Schema where ODI inserts and updates the target tables.

WORK_SCHEMA – Schema where all the ODI Temporary table ( C$_,I$_ etc ) are created and dropped by ODI.

Work Schema is an important part of the ODI Architecture. As you all know ODI create Temporary tables, for its loading, integration and transformation from the various source to the target, such as C$_, I$_ etc.  These temporary tables can create a lot of junks and ugliness in your target table in the long end.

The best solution is creation of separate Database schema or user called “WORK_SCHEMA”  or ” TEMP ” or “ODI_TEMP”  whatever you wish name as per your environment , but the most important part is how you use it .

I very strongly recommend the usage of using this TEMP  as ‘ Schema (work schema ) ‘ option in Physical schema for all the technologies. The result and the impact of this is whenever ODI create temporary tables ( C$_, I$_ etc ), you can drop or clean the space of this schema as any time, thus avoiding clutter or temporary ODI tables in the target schema.

Let’s see this option diagrammatically.

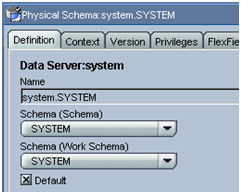
Option 1 – Having the Schema and the Work Schema in Topology same.


In such a scenario, ODI will create Temp tables (C$_, I$_ ) in the same schema , the result as you can see lots of junk . Would you love to have such scenario in your Production box?

SYSTEM (Schema)

EMPLOYEE ( Table)
SALES ( Table)
C$_employee
I$_employee
C$_sales

I$_sales

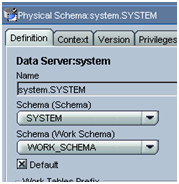
Option 2 – Having the Schema and the Work Schema in Topology different.


In such a scenario, ODI will create Temp tables (C$_, I$_) in the different schema, the result as you can see no junks and DBA can drop this WORK_SCHEMA ODI tables at regular interval.

SYSTEM (Schema)

EMPLOYEE ( Table)
SALES ( Table)

WORK_SCHEMA (Schema)

C$_employee
I$_employee
C$_sales

I$_sales

I know what you all are thinking, isn’t ODI drops all the temporary tables, well the answer is yes but how many times you have created interfaces that you would create just for

Testing purpose

or failed interface still not going till Drop table option

or some time due to some error it fails to drop the table ,

The result presence of these tables permanently in Database unless dropped manually.

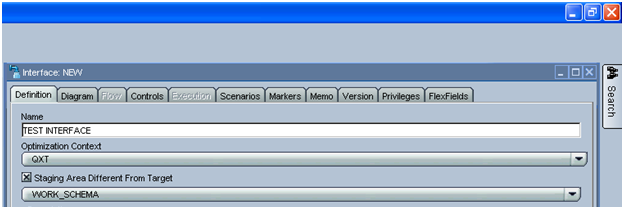
I have seen companies using such schema with the option “Staging are different from the target” which is not a good practice of using such schema, as you generally developer would forget to use this option. Moreover, its best and easy to implement in topology rather than to use at 100s of interface created and still the Knowledge Modules creates the Temporary schema in the work schema before doing the Insert and Update.


Second advantage of defining in the topology is that, mostly we define the temporary table in the work schema so we would create all the temporary tables in work Schema.

This option can be considered an important aspect in ODI Best Practices.

October 22, 2009
by Cezar Santos
13 Comments
Categories: How to , Logic , ODI , Tips and Tricks

Tags: , , , , , , , , , , , , , , , ,

Single Post View


How to show Business Messages on Operator and, too, debug variables…

Hi Guys,

I frequently got emails asking how to do show Business messages on OD and, as there isn’t such feature until version 10.1.3.5, I created a way to have it.

It’s just like a magic trick!

We will need an “assistant”….  Let me see….   Please, you, the ODI Procedure! Come to stage!!!!!

Now the preparation to the magic!

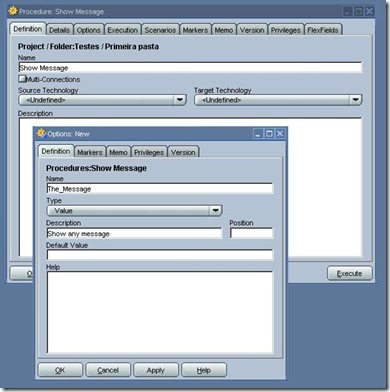
1) Create an Option in the Procedure, we can call it The_Message (Type Value), like:

Option to show Message

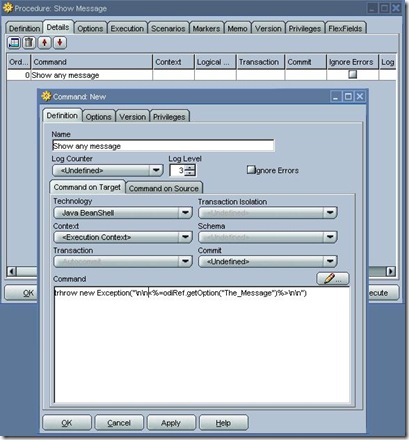
2) Now create a step, we can call it “Show Message”
3) Put the technology to Java BeanShell

Add the following code:

throw new Exception(“nn<%=odiRef.getOption(“The_Message”)%>nn”)

Like:

Procedure to show Message 

That is it! Nothing more!

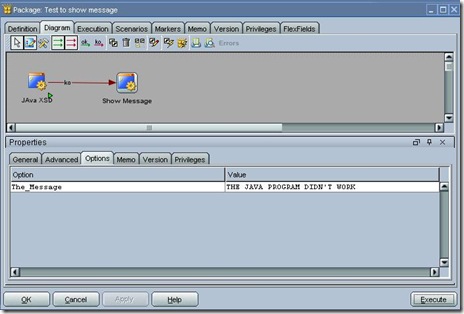
To use it, add to any package, click on it, go to its proprieties, Option Tab and write however it the message you wish to show at Operator. It will be like:

Package to show Message

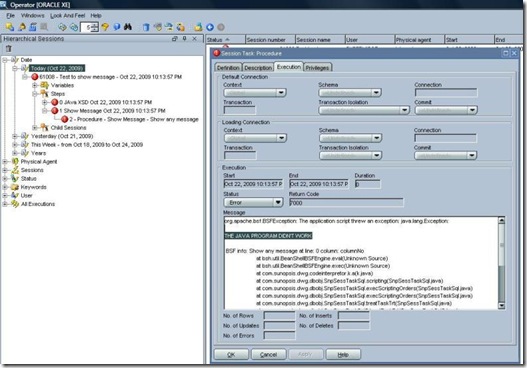
Now, if you go to operator, that is what you will get;


Operator to show Message 

Magic Done! Did you like?

OK, now just a small tip! As you see, the “Show any message” step is in RED, that means “The process will be stopped here”. If you wish let it as “Warning” and do not stop the process, click on the checkbox “Ignore Error” in the Procedure step and you can add more steps after the Procedure “Show Message”.

Remember that you can use this Procedure infinite times in the same package or any other… Just change the value of the Option.

That is very useful to debug variable and gots its value at Operator!

Make any sense??

Once more, comments are very welcome!!!!!!


Cezar Santos