

First Of all I would like to thank Cezar Santos for his effort in bringing the best of ODI to the world .
Confirming to trend of this site I shall explain the steps to ODI installation for window and Linux.
The latest version can be downloaded from
http://www.oracle.com/technology/software/products/odi/index.html
All the related technical documentation for ODI can be downloaded or accessed from here
http://www.oracle.com/technology/products/oracle-data-integrator/10.1.3/htdocs/1013_support.html
After downloading unzip the files at a particular location .
-
For windows , go to Setup->Windows click on the ‘ setup.bat ‘
-
For Linux ,go to Setup -> Linux and run the script ‘ setup.sh ‘ .
Before running the installation make sure you have the required permission to the files inside the folder else you would encounter error related to permission.
To ignore System Prerequisite in Linux , run using
sh setup.sh -ignoreprereqs
1. Automatic Installation
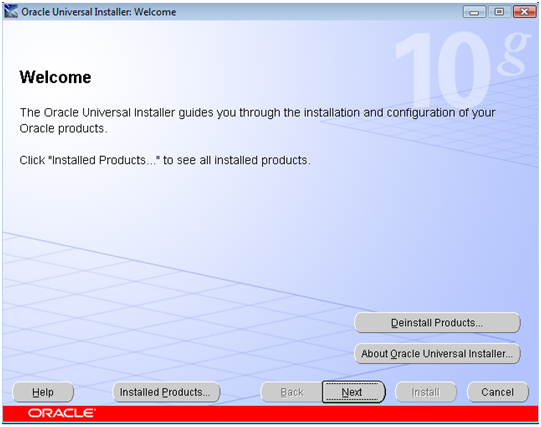
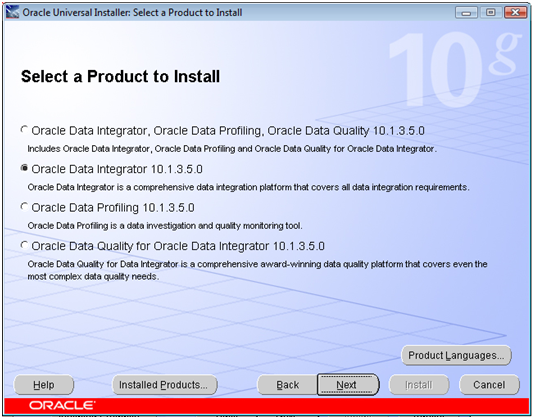
Please find the screenshots of ODI Installation.
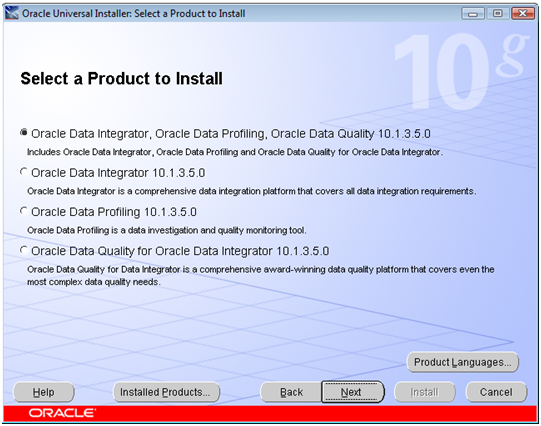
Select the products as desired.
For the time being I am installing only the Oracle Data Integrator . I would be covering the Data Profiling and Data Quality at the later posts.
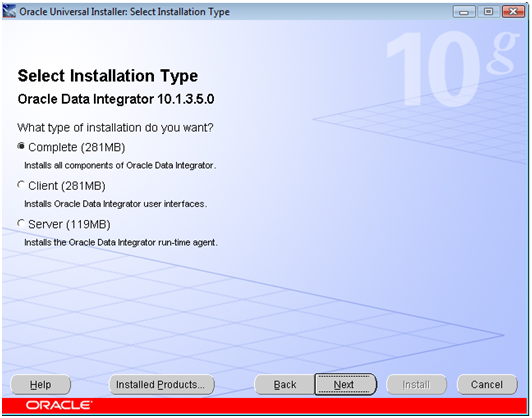
For both complete and client type Installation , all the products will be installed,
whereas for Server Installation type only three products namely
- Java Runtime Environment
- Oracle Data integrator
- Oracle Data integrator Agent
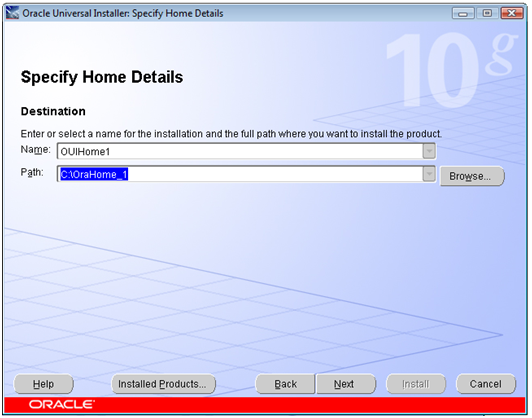
Specify the Name and the Path of where ODI will be Installed .
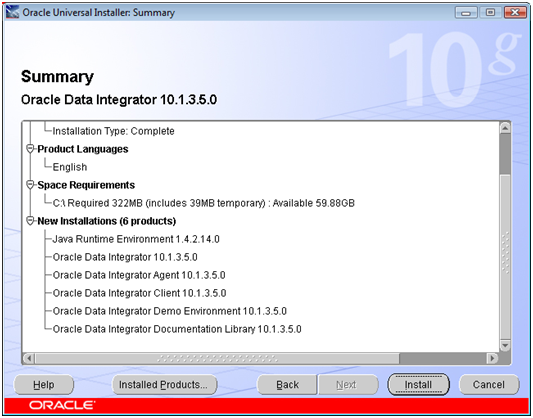
Click next and we are done with installation.
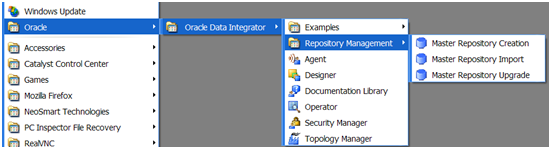
Windows
In Windows , the path is Programs->Oracle ->Oracle Data Integrator , as shown below .
Linux
For Linux , use the following path ,
-
Export ODI_HOME=$Home/OraHome_1/oracledi
-
Export ODI_JAVA_HOME=$Home/ OraHome_1/jre/1.4.2
-
CD /OraHome_1/oracledi/bin
run the required tool
[ Note: Please change the above environment parameters accordingly. ]
2. Manual Installation
In case you encounter error or unable to complete the installation, the other easiest solution is to copy the ‘ oracledi ‘ folder from the downloaded unzipped file and give the necessary permission in Linux.
The only thing you would need is to install JDK separately.
For Windows go the ‘ Oracledibin ‘ Folder and access the required tools and go the Windows Environment Variable and add ‘ODI_JAVA_HOME ‘ with your jdk folder path.
For Unix, enter the Environment Variables ,
-
Export ODI_HOME=$PATH/CD_10.1.3.5.0_LINUX/oracledi
-
Export ODI_JAVA_HOME=$JAVA_PATH
-
CD /OraHome_1/oracledi/bin
[ Note: Please change the above environment parameters accordingly. ]
Here we are with ODI Installed. Look for my next post about setting up Master and work Repository.
Have fun. Keep in touch for more exciting updates on ODI at Odiexperts.com